how to create Map - tutorial
in Illustrator
It's easy peasy lemon squesy

Creating maps in Illustrator is nothing difficult. Why? Because you are awesome and you can do it. These are few steps for creating a map in Illustrator based on Andy Stevenson's lecture. Grab yourself a mouse and make yourself feel comfortable, we are starting.
-
Google Earth or Google Maps going to be your best friends in this task. Screenshot location you would like to map from satellite view
-
Open Illustrator and magic folder prepared from Andy
-
Remember that you really need to work with layers otherwise, there will me massive mess
-
A good start is with a tree (flora) layer. Create a new layer, choose any color you wish to flora have, select a pen tool and start drawing. Do not worry if it is not very precise.
-
Create another layer and call it water - and because you are clever head you know, that in this layer we will be drawing lakes, rivers ect ... Same rules apply as in a previous step. Please make sure you are working in the WATER LAYER and not in TREE LAYER. One tip in this step. If you want to create curves and have beautifully rounded or oval shape lake, just press the pen tool and drag it. It will make a curve. Check the picture below.
-
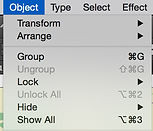
Same rules apply for your road lines and building shapes. I am going to repeat myself but bare in mind to have each section in separate layers. Also, another tip is to group all the lines in each layer together. Simply go to Object > Goup. If you need to adjust let's say color for example, you do not need to click on each element separately but thanks to this it will adjust all of them and you will save some time.
-
You as a visitor, I bet you would also like to know which path you can take. Just create another layer and call it paths, select from the left column the red stripy thing and create a path near the lakes, woods ... Again, very useful is to use curves so it is not that edgy.
-
When you have done your flora, water, roads, building, paths lines and shape let's add some "map like" background. just used any color you like - if I can recommend use pale colors - pale yellow is good, just create a rectangle. As you may notice, it might cover all of your work, do not worry, just drag the layer background on the very bottom ( just above your original google Maps layer)
-
Does it look like a map? Great! But let's add some pictograms so people know what they can see. Just create another layer with pictograms and add them wherever you wish.
-
As a cherry on top let's add the name of the site or any other written text - and yes, in another separate layer.